When connecting to Amazon EC2 Instance hosts via SSH require storing SSH key-pair for the user authorized to access. As a result of this, organizations need to store, share and manage these SSH key-pairs and we need to save the key when the instance is launched.
On our AWS management services, the EC2 instance connect process will be carried out by our AWS Experts and can provide all instance management services
Amazon EC2 Instance Connect solves many of these issues by ;
Centralized Access Control :
You will get per-user or per-instance level centralized access control over the EC2 Instances. The IAM Policies and principles remove the need to share and manage SSH keys.
Short-lived Keys :
In an instance, the SSH keys are not persisted but are momentary in behavior. The keys are only accessible when an authorized user connects to the instance and make it easier to grant or revoke access in real-time. It will also allow us to move away from longly lived keys. By using the SSH keys generation methods for connecting the instance via SSH we need to save the key pair generated on the first time when an instance launched.In that case we need to save and manage the keys.
Limitations :
- The given Linux distributions which are supported EC2 instance connect installations ;
Amazon Linux 2 (any version)
Ubuntu 16.04 or later- If you have already configured AuthorizedKeysCommand and AutherizedKeysCommandUser for SSH authentication, the EC2 instance connect installation will not update them and hence you can not connect EC2 instance connect.
How to setup EC2 Connect ?
First you have to create new IAM policy for EC2 instance connect. You can create an IAM Policy from the IAM section in dashboard.
- Next, you have to select Policies.
- Click on the Create policy.
- You need to choose the JSON section and you can add the below lines there.
{
    "Version": "2012-10-17",
    "Statement": [
        {
            "Sid": "VisualEditor0",
            "Effect": "Allow",
            "Action": "ec2-instance-connect:SendSSHPublicKey",
            "Resource": "*",
            "Condition": {
                "StringEquals": {
                    "ec2:osuser": "ubuntu"
                }
            }
        }
    ]
}
You can change the “osuser” to your EC2 Instance user.
Then select the “visual editor” option and click on the “EC2Instance connect”, from there you can choose the “All EC2 instance connect actions” and also check the Resources are selected as “All resources”.
After that proceed with the “next tags”, it is an optional step if you need to add tags you can add them there. Next, you have to review the summary and give a name for the policy.
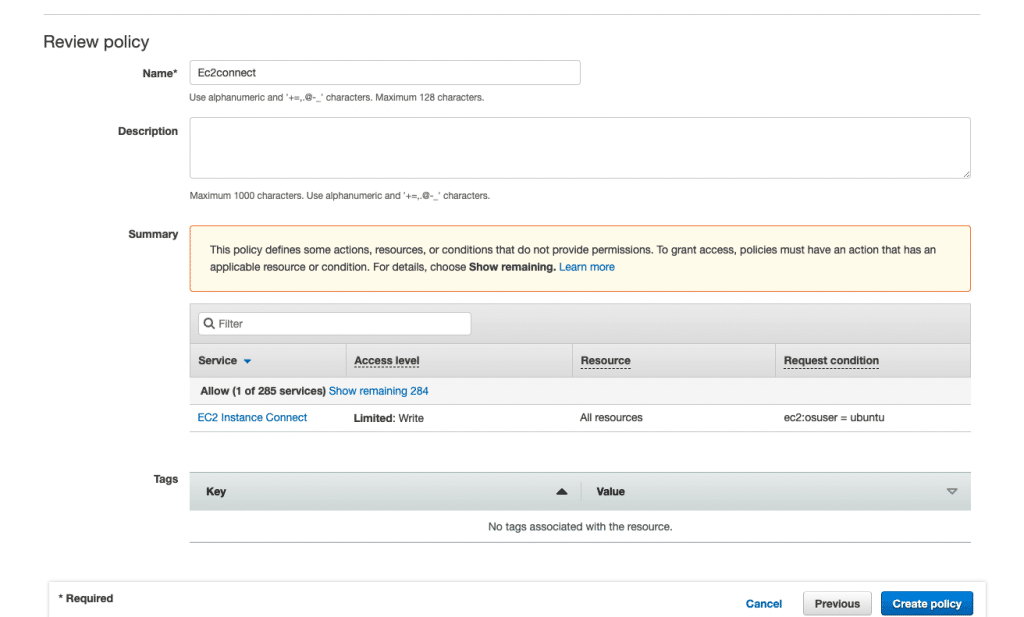
Finally, you can create the new policy by clicking the “create policy” option.
Then you have to create a new IAM role for EC2 instance connect. You can create it in the “Role” option from IAM section.
- Click on the “create role” option
- choose a use case (in this we have to choose EC2)
- Click on the “Next:permissions”
- select the policy that we have already created for EC2connect from the lists
- Click on the Next :tags. This is an optional step and if you need to add tags you can add them here.
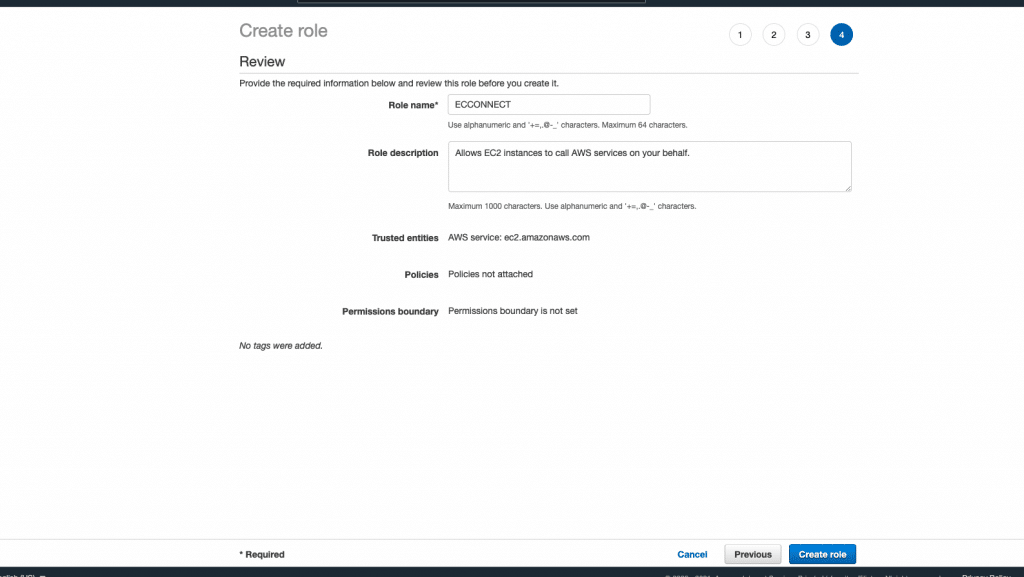
- Next you have to review the role details choose and give a name for the new IAM role also.
- Finally, you have to create the role by clicking the “create role” option.
Then you have to attach the policy to the IAM user
- Select Users option in IAM section.
- Select the required user and click on the Add permissions option.
- Then choose “Attach existing policies directly” option.
- Next review and click on the Add permissions.
After completing these steps you need to attach the newly created IAM role for EC2 Instance connect to your EC2 Instance.
In order to do this you can go to the EC2 instances section and select the required instance. There you can see the “modify IAM role” option from the action –> security section.
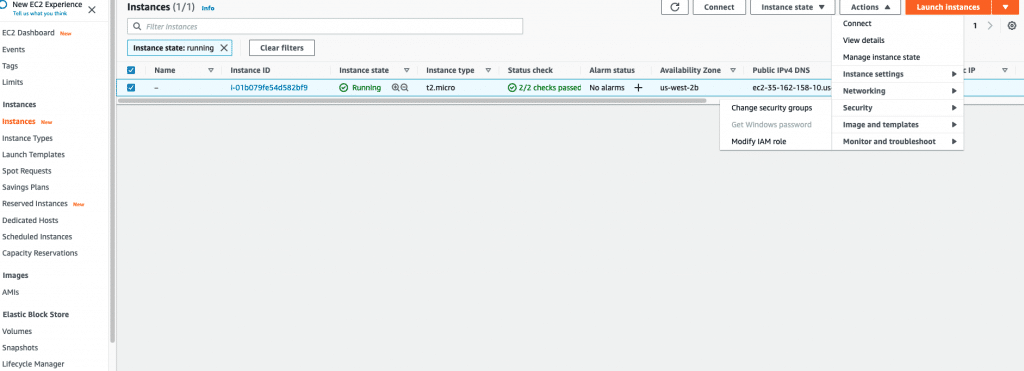
From the IAM role lists, you can choose the IAM role that you created in the previous step and save the settings.
At last, you can connect the EC2 instance using EC2 connect method by selecting the instance and clicking the “connect” option which is showing in the upper section.
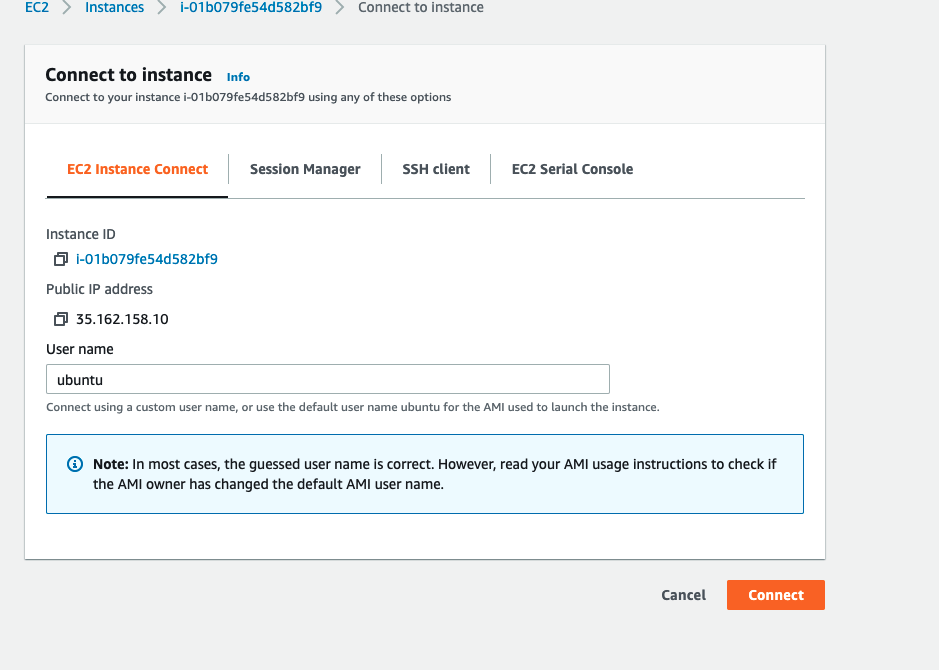
Then proceed with the connect option as shown in the above image. You can now successfully connect the instance using the EC2 instance connect method.
If you are facing any issue with the EC2 Instance connect setup, Contact our technical team Experts right now to get it fixed.