
Plesk is a web hosting and server data center. where it works with both Linux and Windows operating system. where you will be getting a mail server, web server suite, FTP server, also the DNS management tools and many more extensions that can be used to improve the performance of the server.
This blog helps you to install Plesk on AWS lightsail Linux server and if you are looking for installing and managing Plesk for your application or server, please contact our expert team to get it done on behalf of you. you can also refer our Plesk server management plan to get it done under monthly server management.
Install Plesk in One Click
To install Plesk Onyx with a basic list of components you need to run the following command:
# sh <(curl https://autoinstall.plesk.com/one-click-installer || wget -O - https://autoinstall.plesk.com/one-click-installer)Deploy AWS LightSail instance with a web installer.
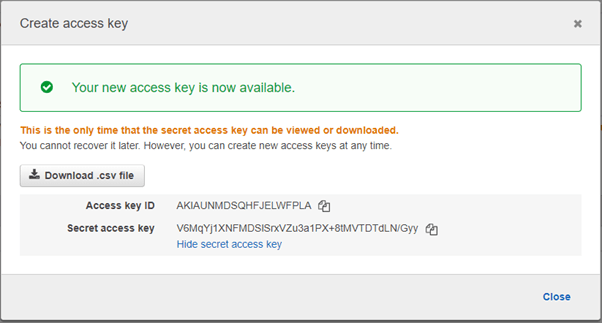
- Create a new Access Key ID/Secret Access key on AWS and download the .csv file.
2. On the web installer page try to specify the generated pair.
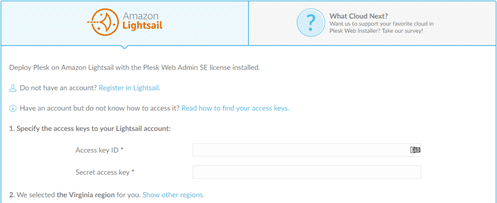
3. Choose the appropriate plan as per your requirement.

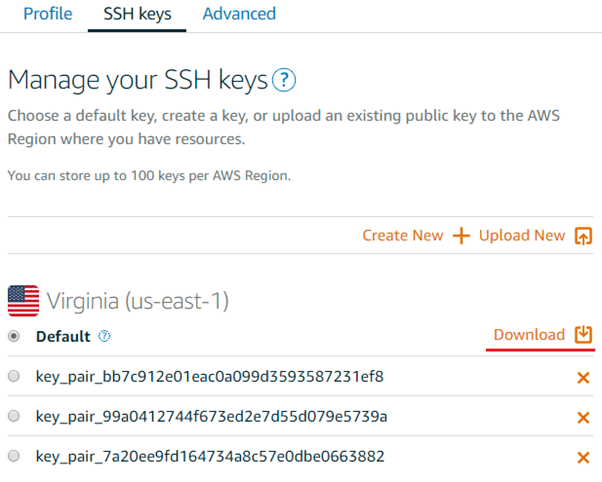
4. Download the default key from the previous region. (Virginia on the screen above)from the Lightsail page:
- Generating the public key using the Putty Gen for the windows and for the Linux/MacOS uses ssh-keygen
# ssh-keygen -y -f ./LightsailDefaultKey-us-east-1.pem
 ssh-rsa      AAAAB3NzaC1yc2EAAAADAQABAAABAQDTsW2Q/pq+89VQSs+ylSRJgUx5knmr1wxTrD0d4Qh1qonPa+UolYbK+zcxk8PNNdC5PYHseoMMbI33iRbLIixBB9B0tAIa3fJGzpdwjOWJ4mvdlBkAsP96Nw/2J4EefMtXAi9XHzunQY9Z++cbGJz0FYRLjGR5MeaUwOjnAjCGG/1a6lh3mUe5wBg95p+6ECVYjEQkysBfPh1O/vy9CAzTfxqnbmaWzNO2WqaSD7p8hksGJYlnVqjfggPLDQfggJkSNZlY9WtMe3/nepb6wiEs3FUMomecBdMxiqoTaEKK9a8RaTvZBkXcb4C9I/+V+JfenMyR88uliC5S0DSVq09B
Windows
Download imported private key into Putty Gen.
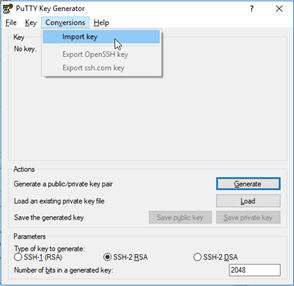
Click on the “Generate” button.
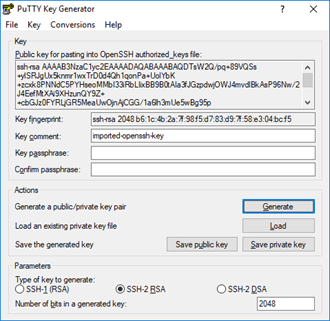
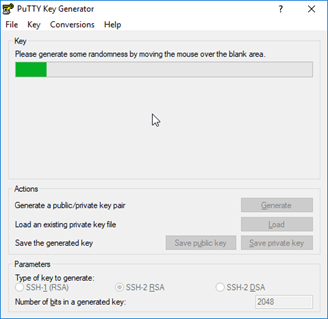
Generate entropy and the key.
Copy the generated public key and save it in a separate file.
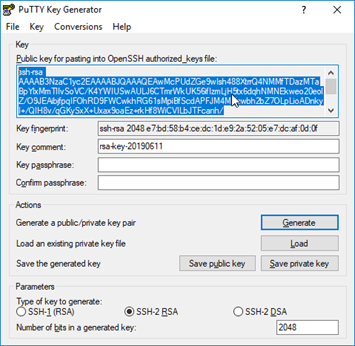
Choose the “Enter key manually” and paste the key into the text file on the “web installer page”.

- Click on the CREATE PLESK INSTANCE by choosing the instance name.
- Proceed with the installation by following the instruction from the Automatic Installation with Plesk web installer section.
Installing Plesk via SSH
For the installation try to connect with the server via SSH as a root user or with ‘Sudo’ access.
To Install Plesk with a basic set of components and then run the commands.
# sh <( curl http://autoinstall.plesk.com/one-click-installer ||
wget -0 -https://autoinstall.plesk.com/one-click-installer)
Note: This method is used For the latest Plesk version installation.
Install Plesk with a custom set of components and then run the commands.
# sh <(curl https://autoinstall.plesk.com/plesk-installer || wget
-0- https://autoinstall.plesk.com/plesk-installer)
Run Plesk with Docker.
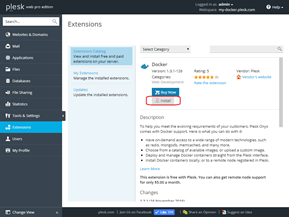
To install Plesk using Docker we need to install Docker extension for plesk first.
Deploying and Installing Plesk Docker.
- Click “Extensions” from the Menu.
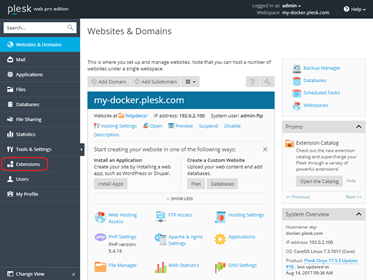
Select the Plesk docker from the extension.

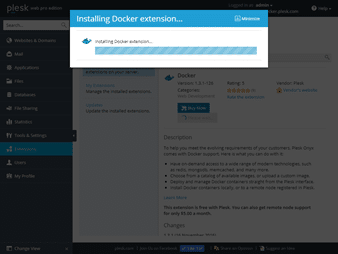
Click on the install button as it is shown below. (wait until it finishes)
Later, click on the “Go to extension” button.
Connect to a server via SSH as a root user or with the ‘sudo’ access for the installation.
Execute the following commands to run the Plesk on the Docker.
# docker run -d it -p 80:80 -p 443:443 -p8880:8880 -p 8443:8443 -p8447:8447 Plesk/Plesk