Securing the domain with lets encrypts certificate (Plesk Onyx and the obsidian).
This topic covers the steps to install an SSL certification for a domain in Plesk (Lets Encrypt/another certificate). Are you looking for the export to install and manage the Plesk server on behalf of you. You can try and refer our Plesk server management plan to get it done under monthly server management.
Before securing a domain with a Lets Encrypt certificate and ensure the domain name is identified with a public Ip address of Plesk server from the internet.
- First, log into the Plesk.
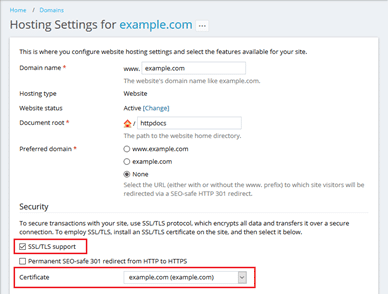
- Then go to Domains and select the domain that you want to secure. Click hosting settings.
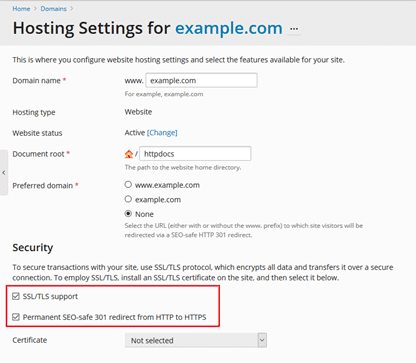
- Ensure that SSL/TLS support is enabled in the hosting setting page.
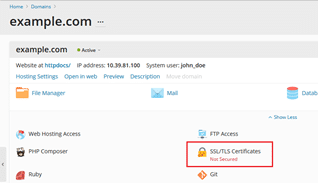
4. Get back to the domains dashboard and then click on to the SSL/TLS certificates.
5. Click on “get it free” button in Lets Encrypt section.
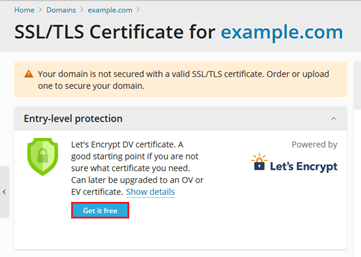
- Then select the appropriate one from the given option. Recommend to select :
- Include a www. Subdomain for the domain and each domain alias.
- Secure webmail on this domain
- Assign the certificate to the mail domain.
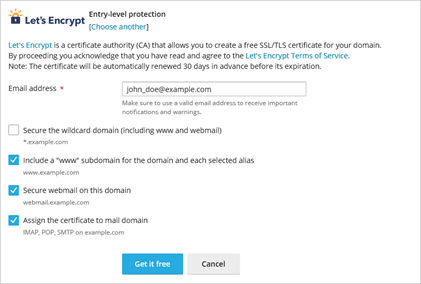
- Click “Get it free“. The SSL certificate from Let’s encrypt will generate and secure the domain. The certification is valid for 90 days and will be auto-renewed by the Encrypt extensions.
Securing a domain with an SSL certification from other certification authorities.
First, you need to purchase the SSL certification for your website, or you can choose the free certificate provided by the Lets Encrypt (follow the instructions below).
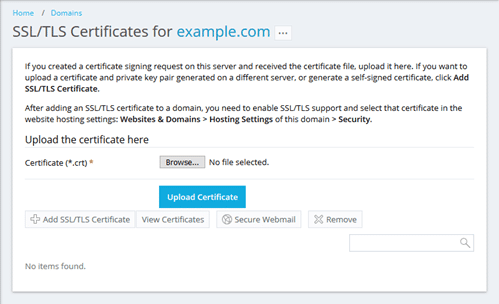
- Go to Domain > example.com >SSL Certificates, fill the fields and click the Request button.
- log into the Plesk
- Go to the Domains > example.com >SSL /TLS certificates > Advanced setting.
- On the SSL/TLS certification page, add your certification.
- If the SSL certificate is stored in a single *.crt file.
Click on the Browse and select a certificate file. Then click on the upload certificate.
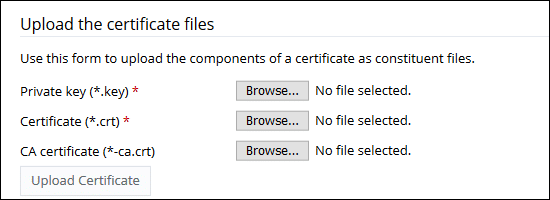
- If the SSL certificate is stored in the form of *.key and *.crt files.
Click on Add SSL/TLS Certificate and select the Upload the certificate files section and upload the files. The private key and both certificates contain a *.pem file in your certificate, check it by opening the *.pem file in any separate text editor. Try to upload it twice, both the private key and certificate and then click on the Upload certificate once it finished.
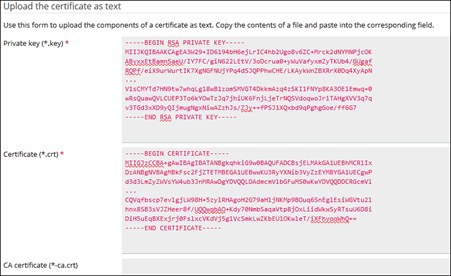
Click Add SSL/TLS Certificate and scroll down to Upload the certificate as text and then paste the certificate and the private key files into the corresponding fields. Click Upload certificate once you finish.
- Once you have created the certificates, then go-to Domain > example.com >hosting settings.
- Enable SSL support
- Select created SSL certificate and then click Ok button.