Fail2ban is a helpful software that enhances the security of Linux servers by preventing unauthorised logins and suspicious attacks. We monitor the logs of services like SSH and Apache to operate this service. The main goal is to prevent multiple login attempts, which improves security measures.
To install and set up fail2ban,follow the below steps
- Install fail2ban package using commands
apt update
apt install fail2ban -y
2. Start and enable Fail2ban service
systemctl enable fail2ban
systemctl start fail2ban
3. Check Fail2ban service status using below command;
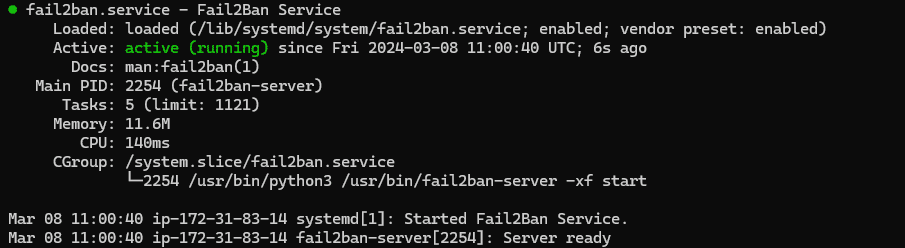
systemctl status fail2banIf the service is functioning correctly, the output will display as shown below:
4. After successfull installation, Configure the Fail2ban
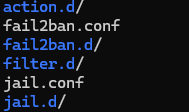
Fail2ban configuration files are located in /etc/fail2ban directory. Folowing are the important contents in the directory.
To begin Fail2ban configuration,copy the default jail configuration file jail.conf to jail.local using cp command and edit the jail.local file using vim editor.
cd /etc/fail2ban/
cp /etc/fail2ban/jail.conf /etc/fail2ban/jail.local
vim jail.local
First, uncomment the ‘ignoreip’ section line. Next, include the required IP addresses.This section helps you to prevent IPs from blocked by Fail2ban service.

In the next step edit bantime,findtime and maxretry as you need. Screenshot below shows the default settings.
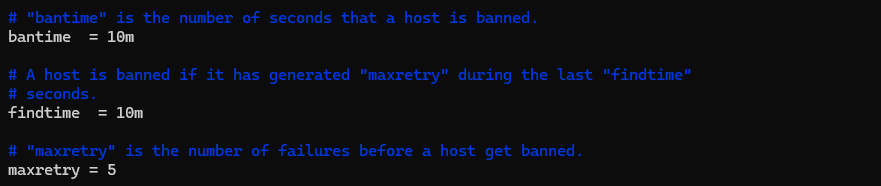
Bantime = The amount of time an IP address is blocked
Findtime = the intervals of time during which an unsuccessful attempt is retried and deemed to be blocked.
Maxretry = the maximum amount of failed attempts that can pass before blocking an IP address.
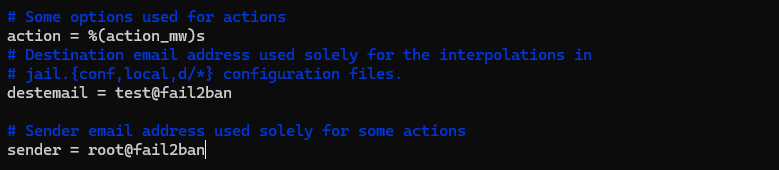
Enable email notifications for blocked IP addresses.
Change the action option and default sender and destination mail addresses as below.
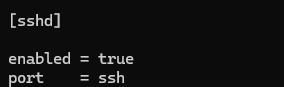
Enable the jail for ssh service. For that go to sshd section and add the line enable as shown below
After making the changes listed above, save the file and close it.
5. Restart the service using command
systemctl restart fail2ban6. To verify Fail2ban configurations, Run the below command
fail2ban-client pingIf there is no configuration error, will get the output as “Server replied: pong”
7. Test the Fail2ban set up by repeatedly logging into your server with an incorrect password. (Once the maximum number of retries has been reached, the IP address will be blocked.)
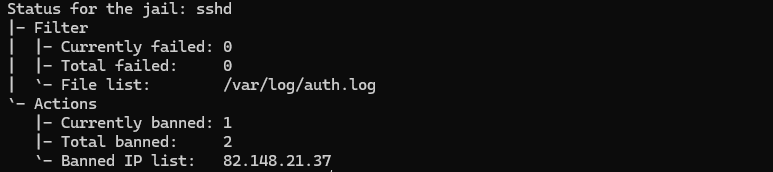
8. For checking the status of sshd jail, Run the below command;
fail2ban-client status sshdyou can see the detailed status and blocked IPs as shown below;
9. You can block and unblock the IP by running the below commands.
fail2ban-client set sshd banip 82.148.19.36
fail2ban-client set sshd unbanip 82.148.19.36
Now you have installed and configured Fail2ban on your server. As per the defined rules,it will perform against suspicious activities and your server will be secured using Fail2ban.
Our Technical Team will be available to assist you with How To Secure SSH with Fail2Ban on Ubuntu 22.04 that can make your job a lot easier. Get in touch with Skynats if you have any queries.