
From this blog post, we get an apparent view regarding the installation and setup of open LDAP server on ubuntu 20.04. The OpenLDAP is an open-source of the lightweight directory access protocol(LDAP) which was developed by the OpenLDAP project and was released under LDAP public License.
The OpenLDAP includes:
SLAP – stand-alone LDAP daemon(server)
Libraries implementing the LDAP protocol
Utilities, tools, and sample clients.
Update/ upgrade the system:
First, you need to ensure the upgrade of your cache server. To update and upgrade Ubuntu, you need to log into the server and run the following commands.
apt update
apt upgrade
once you have upgraded the cache server, then reboot the server if necessary and get ready to install and configure the OpenLDAP.
Installing Open LDAP on Ubuntu20.04.
Run the following commands to install open LDAP on Ubuntu20.04.
apt install slapd ldap-utils
During the installation, you will be promoted to set the OpenLDAP administrative password.
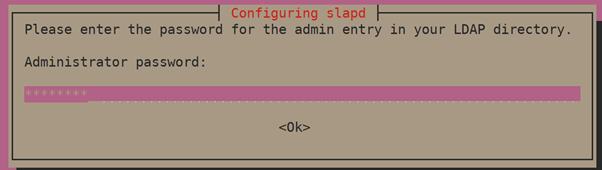
Set the password and then press <ok> button.
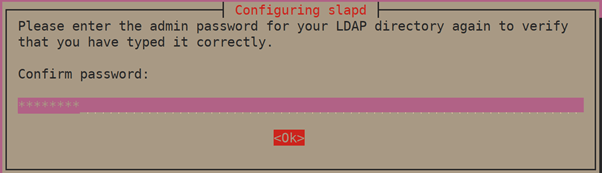
Confirm the password and continue with the installation and select the <ok> button.
You can confirm the installation was successful by using the commands lapcat to output SLAPD database contents.
# slapcat
dn: dc=example,dc=com
objectClass: top
objectClass: dcObject
objectClass: organization
o: example.com
dc: example
structuralObjectClass: organization
entryUUID: e33fc814-e5b9-1038-8243-39a2e6b74e62
creatorsName: cn=admin,dc=example,dc=com
createTimestamp: 20190328152831Z
entryCSN: 20190328152831.511390Z#000000#000#000000
modifiersName: cn=admin,dc=example,dc=com
modifyTimestamp: 20190328152831Z
dn: cn=admin,dc=example,dc=com
objectClass: simpleSecurityObject
objectClass: organizationalRole
cn: admin
description: LDAP administrator
userPassword:: e1NTSEF9WDIzUEJxbXgycUU3M1dRUmppTVYrZE91U0RNMWswSHE=
structuralObjectClass: organizationalRole
entryUUID: e340fedc-e5b9-1038-8244-39a2e6b74e62
creatorsName: cn=admin,dc=example,dc=com
createTimestamp: 20190328152831Z
entryCSN: 20190328152831.519463Z#000000#000#000000
modifiersName: cn=admin,dc=example,dc=com
modifyTimestamp: 20190328152831Z
Step 2: Adding the base dn for the users and groups.
Next is adding a base DN for users and groups. Create filename
basedn. ldif with below contents.
$ vim basedn.ldif
dn: ou=people,dc=example,dc=com
objectClass: organizationalUnit
ou: people

dn: ou=groups,dc=example,dc=com
objectClass: organizationalUnit
ou: groups
Replace the example and com according to your domain components.
Now add the file by running the commands.
$ ldapadd -x -D cn=admin,dc=example,dc=com -W -f basedn.ldif
Enter LDAP Password:
adding new entry "ou=people,dc=example,dc=com"
adding new entry "ou=groups,dc=example,dc=com"
Step 3: Adding the user accounts and the groups.
Enter the password for the user account and confirm it.
$ slappasswd
New password:
Re-enter new password:
{SSHA}Zn4/E5f+Ork7WZF/alrpMuHHGufC3x0k
Create Idif file for adding users.
$ vim ldapusers.ldif
dn: uid=Skynats technologies,ou=people,dc=example,dc=com
objectClass: inetOrgPerson
objectClass: posixAccount
objectClass: shadowAccount
cn: Skynats technologies
sn: Wiz
userPassword: {SSHA}Zn4/E5f+Ork7WZF/alrpMuHHGufC3x0k
loginShell: /bin/bash
uidNumber: 2000
gidNumber: 2000
homeDirectory: /home/Skynats technologies
Replace Skynats technologies with the username to add.
dc=example,dc=com with your correct domain.
cs and the sn with the username values.
{SSHA}Zn4/E5f+Ork7WZF/alrpMuHHGufc3xOK with your hashed password.
Once you are done with editing, add the account by running.
$ ldapadd -x -D cn=admin,dc=example,dc=com -W -f ldapusers.ldif
Enter LDAP Password:
adding new entry "uid=Skynats technologies,ou=people,dc=example,dc=com"
Do the same for the group. Create Idif file.
$ vim ldapgroups.ldif
dn: cn=Skynats technologies,ou=groups,dc=example,dc=com
objectClass: posixGroup
cn: Skynats technologies
gidNumber: 2000
memberUid:
Add group:
$ ldapadd -x -D cn=admin,dc=example,dc=com -W -f ldapgroups.ldif
Enter LDAP Password:
 adding new entry "cn=Skynats technologies,ou=groups,dc=example,dc=com"
You can combine the two file into a single file.
Step 4 : Install LDAP account manager.
I recommend using the LDAP account manager because the phpLDAPadmin doesn’t work well with PHP 7.2+.so follow the instructions to install and configure LDAP account manager.
Install and configure the LDAP account manager on Ubuntu.
Step 1: Install the OpenLDAP server.
First, you have to install and run the LDAP server.
Step 2: Install Apache Webserver & PHP.
You can install the PHP and Apache server by running the commands below.
sudo apt -y install apache2 php php-cgi libapache2-mod-php php-mbstring php-common php-pear
Enable the php-Cgi PHP extensions.
Ubuntu 20.04
sudo a2enconf php7.4-cgi
sudo systemctl reload apache2
Step 5: Configure LDAP Client on Ubuntu 20.04.
If you don’t have an active DNS server in the network try to add the LDAP server address to the /etc/hosts file.
$ sudo vim /etc/hosts
192.168.18.50 ldap.example.com
Install LDAP Client on your ubuntu system:
sudo apt -y install libnss-ldap libpam-ldap ldap-utils
Steps to configuring the settings below.
- Set LDAP URI -It can be either the IP address or the hostname.

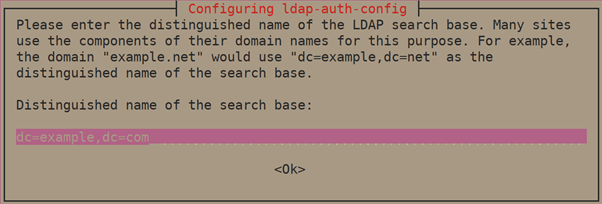
2. Next is the distinguished name of the search base.
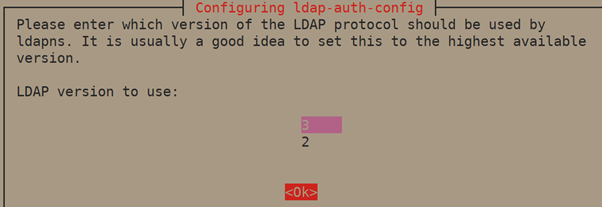
3. Then, select the LDAP versions 3.
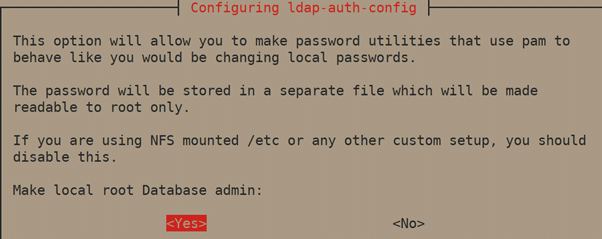
4. Click <yes> button to Make local root Database admin.
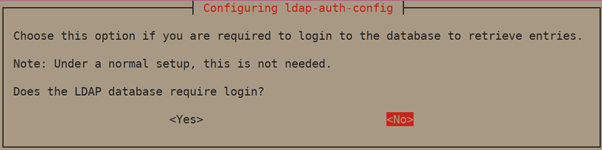
5. Later, choose <No> for Does the LDAP database requires login.
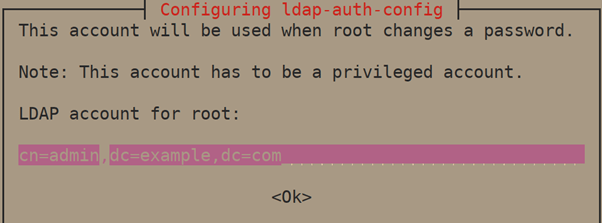
6. Set LDAP account for root, something like cn=admin,cd=example,cn=com
7. Provide the LDAP ROOT account password.

Once you are done with the installation, edit /etc/nsswitch.conf and add ldap authentication.
passwd: compat systemd ldap
group: compat systemd ldap
shadow: compat
Try to create the home directory on the first login by adding the following line to the file /etc/pam.d/common-session
session optional pam_mkhomedir.so skel=/etc/skel umask=077

That’s all before that test the LDAP by switching it into the user account.
root@server1:~# su – jmutai
Creating directory ‘/home/jmutai’.
jmutai@server1:~$ id
uid=10000(jmutai) gid=10000(sysadmins) groups=10000(sysadmins)
Securing LDAP server with SSL/TLS on ubuntu.
The following guideline will help in explaining the use of self-signed certificates.
Step 1: generate self-signed SSL.
First, login into the LDAP server and generate the SSL certificate.
# cd /etc/ssl/private
# openssl genrsa -aes128 -out ldap_server.key 4096

Generating RSA private key, 4096 bit long modulus
 …………………………………………………………………………………..++
 ………………………………….++
 e is 65537 (0x010001)
 Enter pass phrase for ldap_server.key: <Set passphrase>
 Verifying - Enter pass phrase for ldap_server.key: <Confirm passphrase>
Remove the passphrase from the generating RSA private key.
# openssl rsa -in ldap_server.key -out ldap_server.key
Enter pass phrase for ldap_server.key: <Enter passphrase>
writing RSA key
Generate Csr.
# openssl req -new -days 3650 -key ldap_server.key -out ldap_server.csr
You are about to be asked to enter information that will be incorporated
into your certificate request.
What you are about to enter is what is called a Distinguished Name or a DN.
There are quite a few fields but you can leave some blank
For some fields there will be a default value,
If you enter ‘.’, the field will be left blank.
Country Name (2 letter code) [AU]:KE
State or Province Name (full name) [Some-State]:Nairobi
Locality Name (eg, city) []:Nairobi
Organization Name (eg, company) [Internet Widgits Pty Ltd]:skynatstechnologies
Organizational Unit Name (eg, section) []:skynatstechnologies
Common Name (e.g. server FQDN or YOUR name) []:ldap.example.com
Email Address []:[email protected]
Please enter the following 'extra' attributes
to be sent with your certificate request
A challenge password []:
An optional company name []:
Then sign in to your certificate.
# openssl x509 -in ldap_server.csr -out ldap_server.crt -req -signkey ldap_server.key -days 3650
Signature ok
subject=C = KE, ST = Nairobi, L = Nairobi, O = skynatstechnologies, OU = skynatstechnologies, CN = ldap.example.com, emailAddress = [email protected]Getting Private key
Step 2: Configure SSL on the LDAP server.
Copy certificates and a key to /etc/ldap/sasl2/ directory.
sudo cp /etc/ssl/private/{ldap_server.key,ldap_server.crt} /etc/ssl/certs/ca-certificates.crt /etc/ldap/sasl2/
Set the ownership certificate to OpenLDAP user.
sudo chown -R openldap. /etc/ldap/sasl2Creating LDAP configuration file for SSL.
# vim ldap_ssl.ldif
dn: cn=config
changetype: modify
add: olcTLSCACertificateFile
olcTLSCACertificateFile: /etc/ldap/sasl2/ca-certificates.crt
replace: olcTLSCertificateFile
olcTLSCertificateFile: /etc/ldap/sasl2/ldap_server.crt
replace: olcTLSCertificateKeyFile
olcTLSCertificateKeyFile: /etc/ldap/sasl2/ldap_server.key
Use the following commands to apply the configuration.
# ldapmodify -Y EXTERNAL -H ldapi:/// -f ldap_ssl.ldif
SASL/EXTERNAL authentication started SASL
username: gidNumber=0+uidNumber=0,cn=peercred,cn=external,cn=auth
SASL SSF: 0
modifying entry "cn=config"
Step 3: Configure LDAP Client
It will ensure the connection between the client and server is encrypted. Then add the LS_REQCERT allow line to /etc/ldap.conf
echo "TLS_REQCERT allow" | tee /etc/ldap/ldap.confThen configure the OpenLDAP SSL mechanism on below file /etc/ldap.conf
$ sudo vim /etc/ldap.confssl start_tlsssl onNow, the SSL certification is connected between the LDAP client and server.
suggestion
Hope this article is helpful and the following guidelines will help you to install and configure the OpenLDAP account manager to administer to your server. further, any assistance or guideline for installation and configuring of the OpenLDAP our Technical team will be available 24/7 for any assistance.