.
The staging site is cloning your live website that is used for testing purpose before making it live. The staging helps in finding an error, so you don’t have to break up the live website.
Follow the steps to deploy a WordPress staging site with cPanel and for any assistance, you can contact our technical team support for more details.
Most of the users install WordPress locally on their windows or mac system in order to test the changes. Once the update is done, they simply uploaded in localhost to the live server. Here the problem occurs with this approach, what happens if something works on your localhost but not in the live server. Usually, the localhost and the live servers are not running in the same environment.
You can easily prevent all those errors since the staging site is live on the web hosting server by running the same server configuration as your live site.
What is a WordPress staging site?
The staging site is a cloned copy of a site, where the data or the files doesn’t access to public and hosting is done on a different subdomain.
If any changes occur in the staging site that doesn’t affect the production site unless you want them to be.
In an earlier stage creating a staging stage or the development site was a time-consuming process and a bit complicated. Where you have to export the data from the production database and create the new database, copy the files, reconfigure the site and to set up the staging subdomain. Later, reverse the process and try to deploy the changes. That’s the main reason why most WordPress users don’t use staging sites.
Why do you need a staging site?
It’s a good idea to deploy a WordPress staging site to test the changes before publishing it live. The staging site will help the designers and developers who work on your website without giving access to your production installation.
Setting up a WordPress staging site.
To set up the WordPress staging site you need to select the WordPress toolkit from the cPanel from the main page menu. Expand the detailed view that you want to work within.
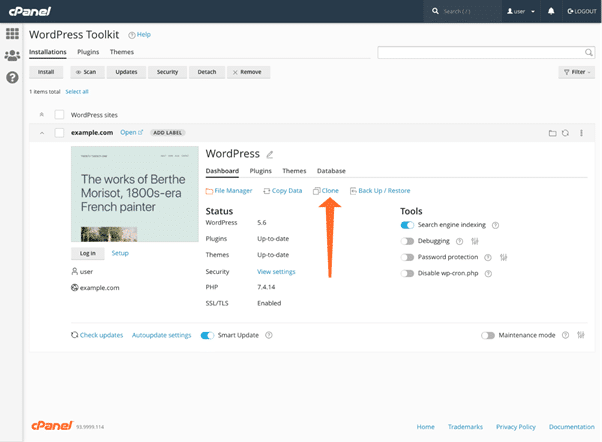
Select the clone tool in the dashboard and choose the staging site’s subdomain and the path. You can select a pre-existing domain or you can create a new one. As per the requirements, you can change the database name.
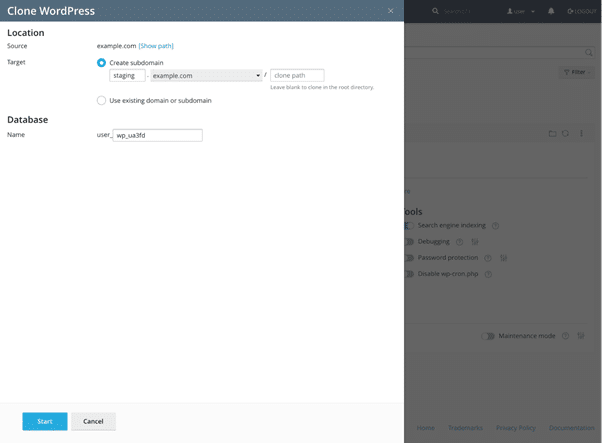
The toolkit will create the staging site and the subdomain.
You can use the WPT’s labels to make the staging site easier apart from the live site. Click Add Label button and select the appropriate option from the dropdown list.
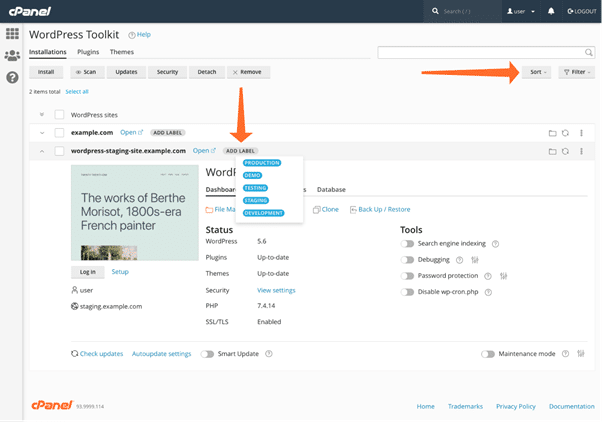
Once done with the label, now you can sort and filter from the dropdown button at the top.
Commit staging site changes to production
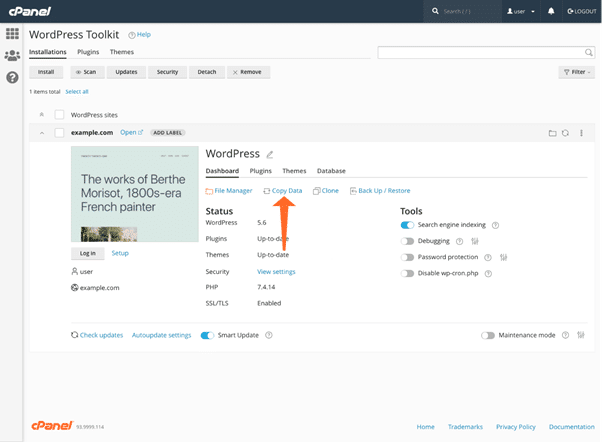
Once you have developed and tested a new feature or design, then you have to push the changes into the production sit for that you need to copy the staging site’s database and files. It might be a bit complicated and error-prone, but the process can be done safely within a fraction of a minute with a toolkit.
Click on the Copy Data tool in the staging site in the dashboard.
Select the production site from the target dropdown menu in the copy data interface. Now you have control over which aspects of the site that been transferred. you can copy the file, specific database tables and the database.
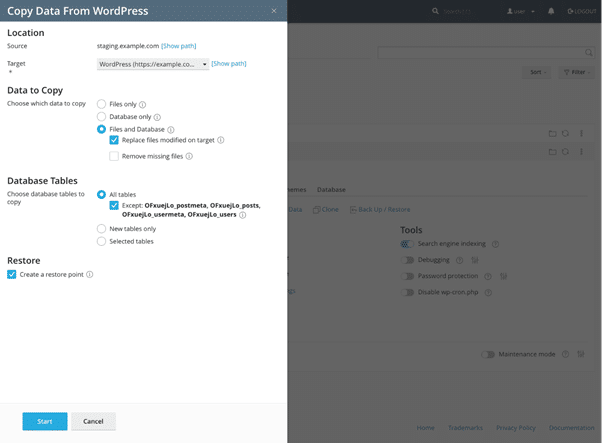
Copying is a destructive operation, WPT will automatically create a restore point so it would be easy for you to roll back if something goes wrong. In short, WordPress toolkit’s clone will provide quick and simple staging site deployment. Where you can create a staging easily and can transfer the changes to the production site.
Conclusion
We have a walk through the process of creating a staging site and deploying changes back to production. Follow and proceed with the steps for further assistance you can take our technical team support.